 | 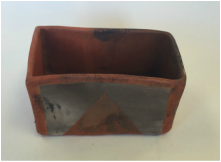 |
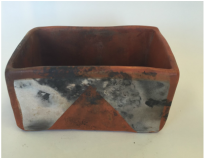
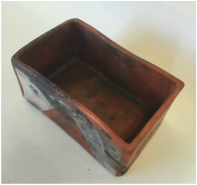
For this pit fired piece, we started out by making our shape in clay. After that, we let it completely dry so that we could put the orange tericidic on it to make it nicer, and for the pit fire to show up more on it. I decided to make it a triangle on each side to make it more unique. After that, we fired it in the kiln, and then it was time to prepare for the pit firing! We sprayed it with a solution (that I can't remember the name of) and then we added salt, leaves, flowers, paper, and colored paper to the aluminum foil, and then wrapped it up. It was now ready to get pit fired. Mrs. Sudkamp pit fired it and then we rubbed wax on it to seal the designs that the pit fire made!
This is so much more unique than other firings because we basically let the firing take its own course! We get to put the materials to give some designs but we never really know how its actually going to turn out which is really awesome!
This is my second time doing this pit firing and I love it! I think it's really exciting to see how your piece turns out. It is really cool that everyone's piece never turns out the same, and that everyone gets their unique twist to it. I really love the "burnt" look on it as well, It changes it up from my regular pieces and gives it a more nature affect.
 RSS Feed
